June 09, 2025
Updated on June 10, 2025 (I hope I removed misleading wording)
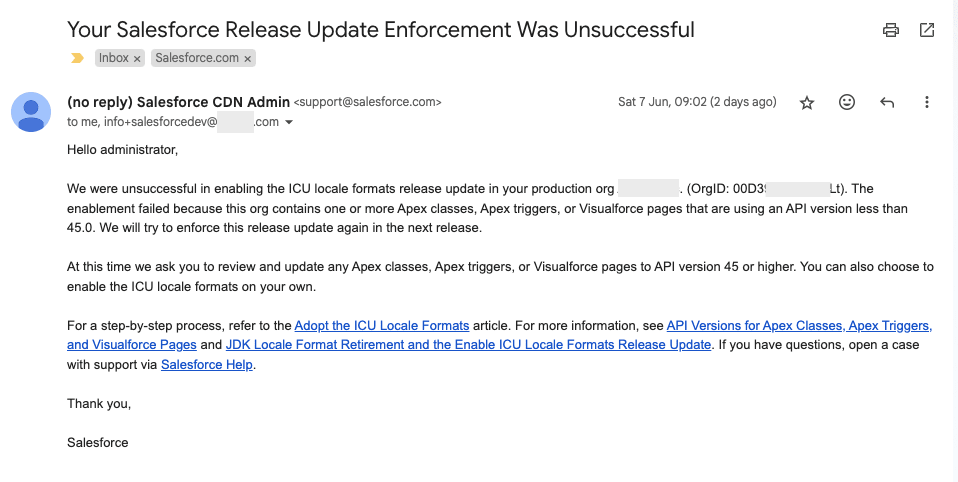
I got the Email below.
I organized the PROJECT of upgrading Apex classes, triggers, Visualforce Pages, and components version to versions higher than 45. A few of my clients had a lot of items to upgrade. With a few clients I don't have access to Production. I had to come up with a process to automate the process of deploying upgraded items without bothering Admins a lot with code and version changes.
This article shows how to automate changing version values of Apex classes, triggers, Visualforce pages, and components.
This article does NOT include steps or description of the whole PROJECT of updating versions to comply with new ICU Locale Format (Go Global with New International Locale Formats) enforcing by Salesforce. The whole PROJECT consists of many other steps that may take months.
There are two options:
1.1. Go Setup -> Developer Console -> Open Execute Anonymous Window. In the code editor paste the code
String xmlString = '\n\n'
   +'<?xml version="1.0" encoding="UTF-8" standalone="yes"?>'
   +'\n'
   +'<Package xmlns="http://soap.sforce.com/2006/04/metadata">'
+'\n';


List<ApexClass> apexClasses = [
   SELECT Name
   FROM ApexClass
   WHERE NamespacePrefix = null
   AND ApiVersion < 45
   ORDER BY Name
];
if (apexClasses.isEmpty() == false) {
   xmlString += '<types>\n';
   for (ApexClass acItem : apexClasses) {
      xmlString += '<members>'+acItem.Name+'</members>\n';
   }
   xmlString += '<name>ApexClass</name>\n</types>\n';
}


List<ApexTrigger> apexTriggers = [
   SELECT Name
   FROM ApexTrigger
   WHERE NamespacePrefix = null
   AND ApiVersion < 45
   ORDER BY Name
];
if (apexTriggers.isEmpty() == false) {
   xmlString += '<types>\n';
   for (ApexTrigger atItem : apexTriggers) {
      xmlString += '<members>'+atItem.Name+'</members>\n';
   }
   xmlString += '<name>ApexTrigger</name>\n</types>\n';
}


List<ApexPage> apexPages = [
   SELECT Name
   FROM ApexPage
   WHERE NamespacePrefix = null
   AND ApiVersion < 45
   ORDER BY Name
];
if (apexPages.isEmpty() == false) {
   xmlString += '<types>\n';
   for (ApexPage apItem : apexPages) {
      xmlString += '<members>'+apItem.Name+'</members>\n';
   }
   xmlString += '<name>ApexPage</name>\n</types>\n';
}


List<ApexComponent> apexComponents = [
   SELECT Name
   FROM ApexComponent
   WHERE NamespacePrefix = null
   AND ApiVersion < 45
   ORDER BY Name
];
if (apexComponents.isEmpty() == false) {
   xmlString += '<types>\n';
   for (ApexComponent acItem : apexComponents) {
      xmlString += '<members>'+acItem.Name+'</members>\n';
   }
   xmlString += '<name>ApexComponent</name>\n</types>\n';
}
xmlString += ''
   +'<version>63.0</version>'
   +'\n'
   +'</Package>'
+'\n';

System.debug(xmlString);
1.2. Make sure Open Log flag is not checked. Execute the code by clicking Execute button.
1.3. Go to Logs tab on the bottom, right click on the latest log, Open Raw Log. Scroll down to the debug output and copy the file content.
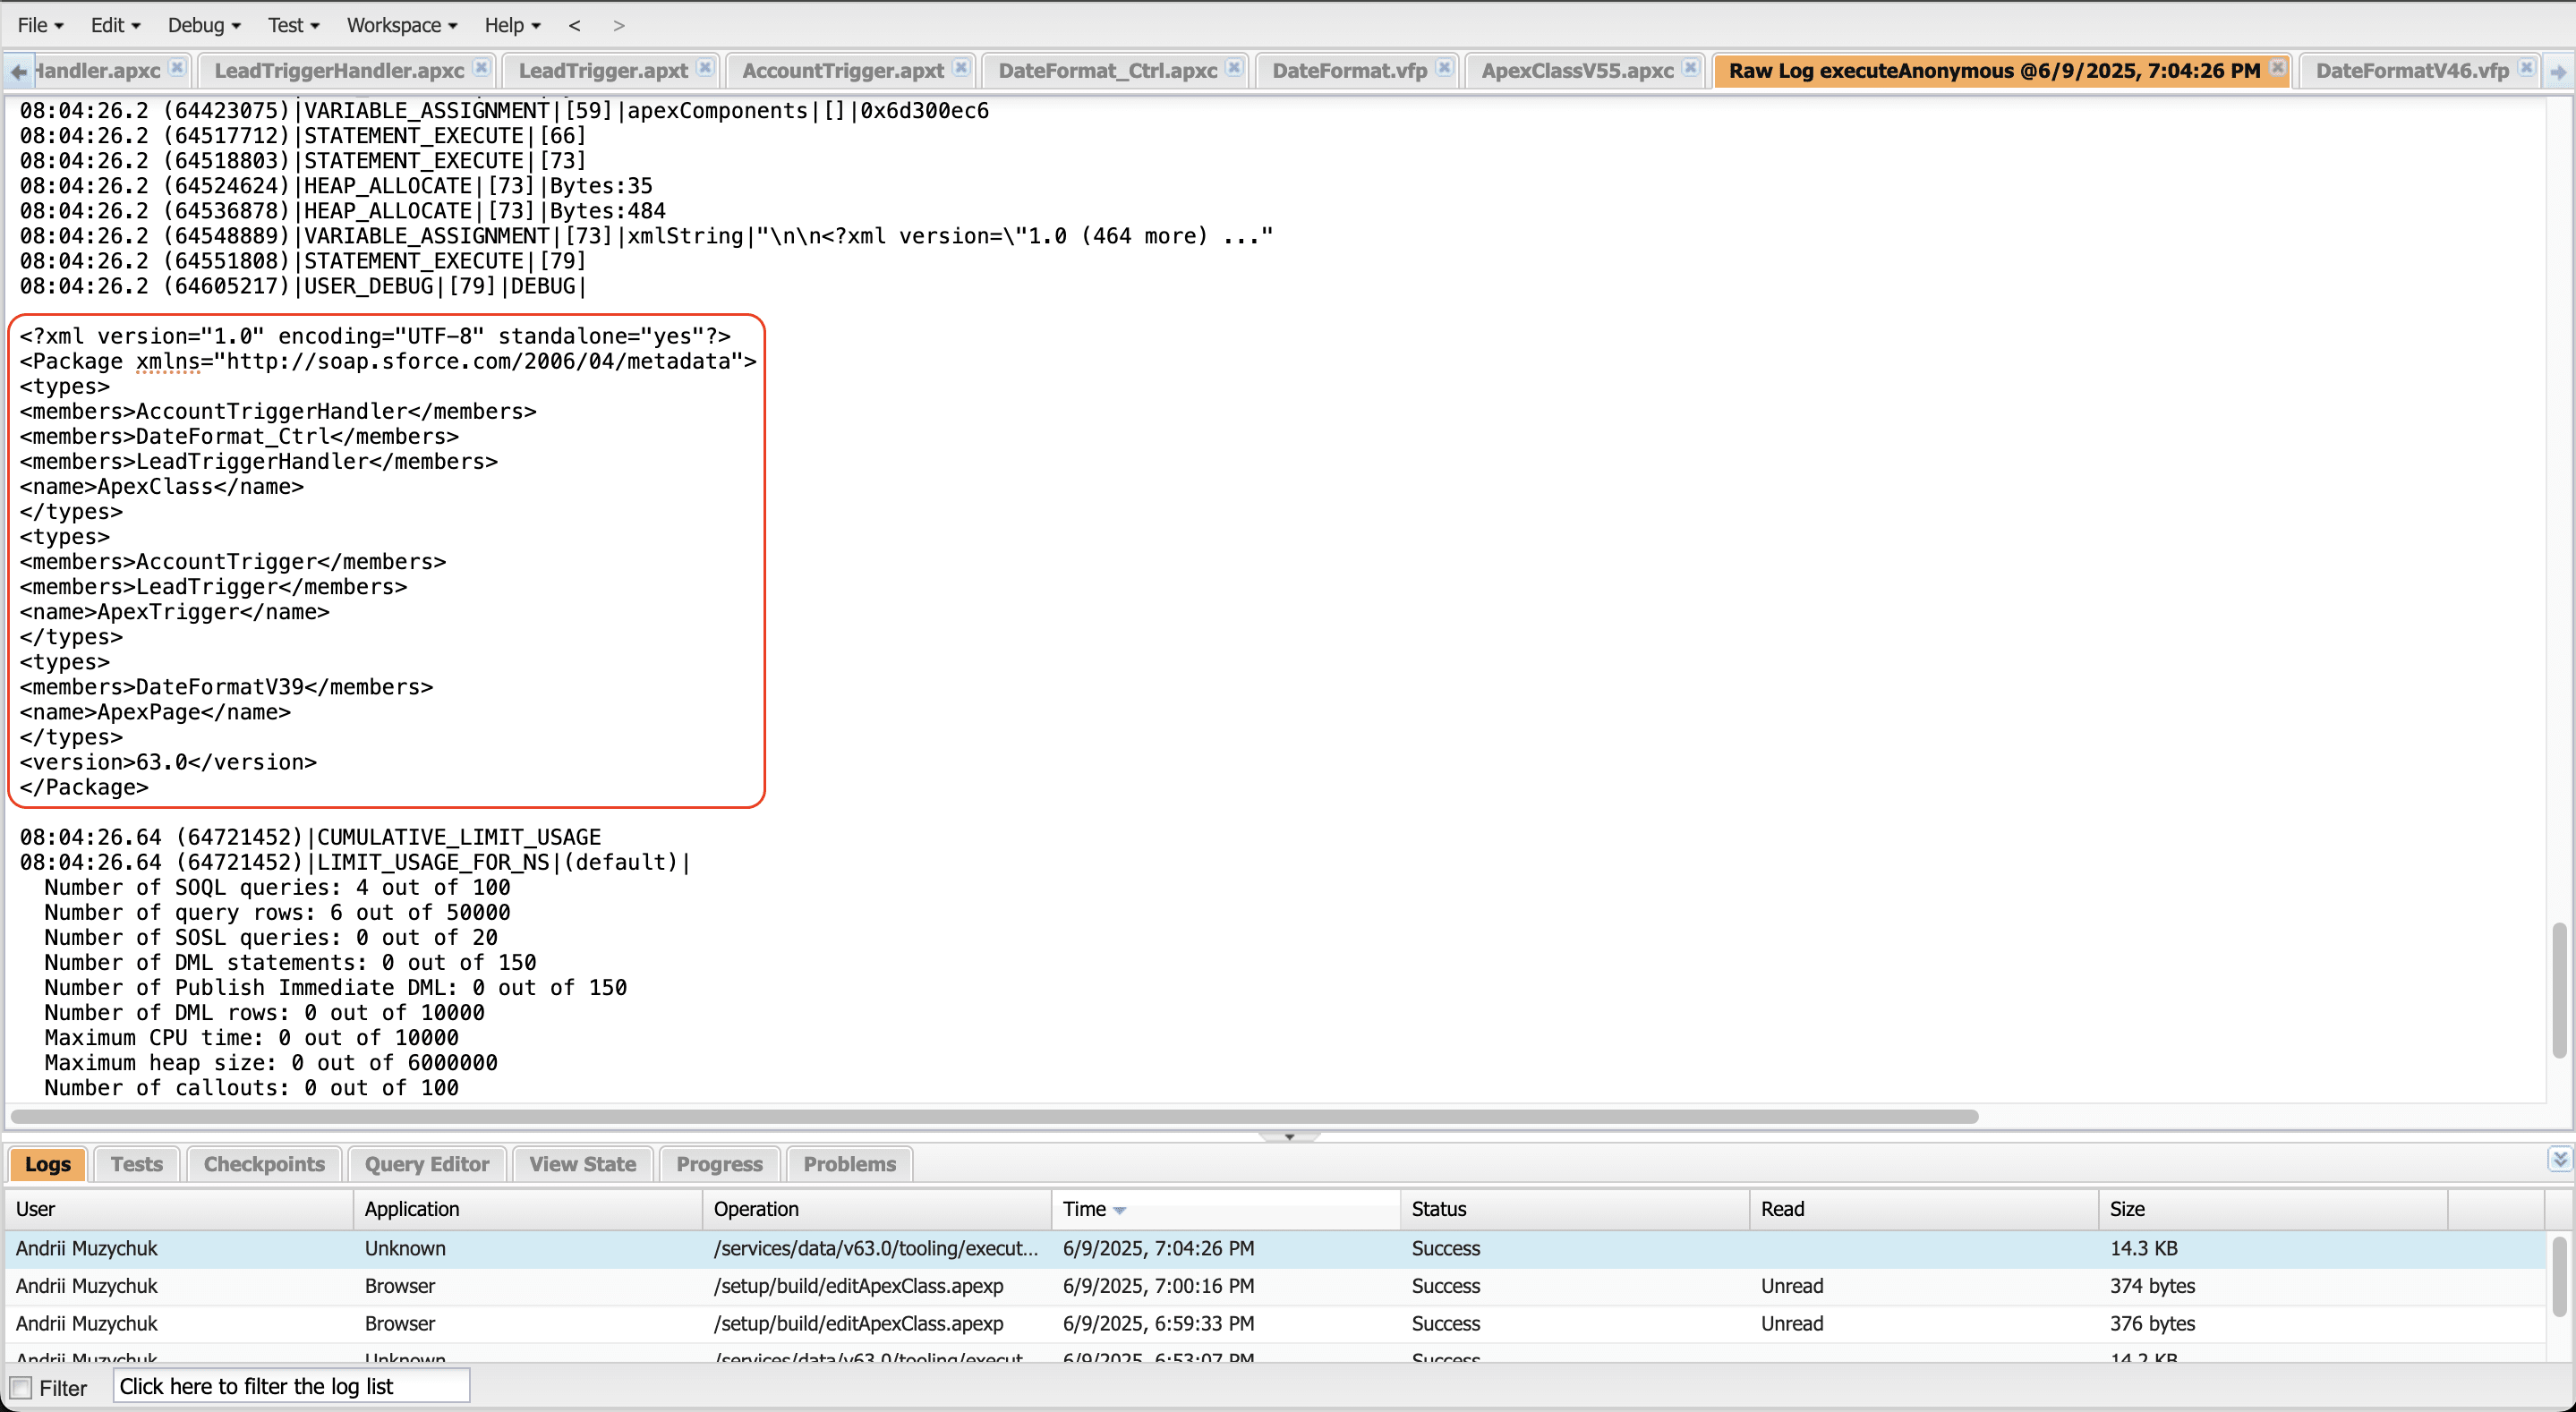
1.4. Save the file content as package.xml file.
2.1. Once you got the package.xml file with ONLY lower than 45 version items you can actually download them localy.
2.2. Go to https://workbench.developerforce.com/ -> migration -> Retrieve
2.3. Choose File -> select just created package.xml file; check Single Package flag -> Next -> Retrieve
2.4. Once the ZIP file is ready download it.
2.5. Unzip the archive and open the folder using any IDE you have. Visual Studion Code is free and lightweight; and you don't need anything additional installed.
2.6. Go to a Search section in your IDE and put
<apiVersion>\b([0-9]|[1-3][0-9]|4[0-4])\b.0</apiVersion>2.7. Use Replace feature of your IDE. The stuff for the search should be
<apiVersion>\b([0-9]|[1-3][0-9]|4[0-4])\b.0</apiVersion><apiVersion>63.0</apiVersion>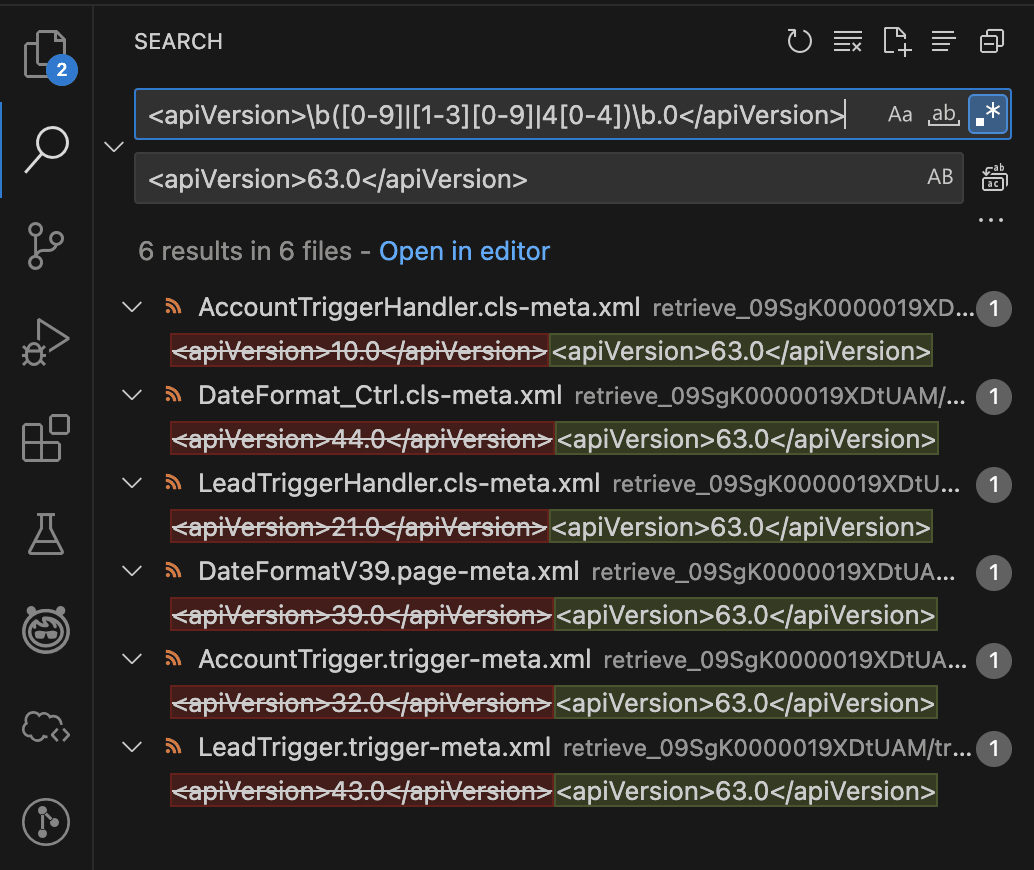 .
.
2.8. Go to the folder, archive it. You open the folder with package.xml file and folders like classes, triggers, pages, components. You select all of them and create a ZIP archive.
3.1. Once you got your ZIP archive with the package.xml file and all the folders you go to https://workbench.developerforce.com/ -> migration -> Deploy
3.2. Choose File -> select just created ZIP archive; check Single Package flag -> Next -> Deploy
3.3. Once the deployment is successful your org is ready to upgrade to ICU Locale Format.
Andrii Muzychuk, Certified Salesforce Application Architect can help you with Unit Tests and upgrade deployment.